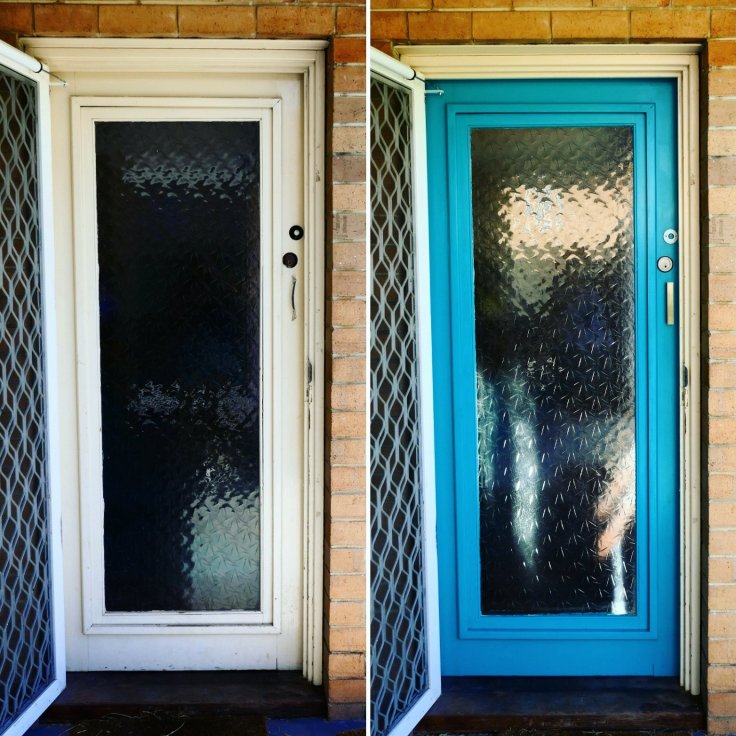
I have always wanted a brightly coloured front door. And now that I have my own house, I thought ‘why not?’ I read some online articles and watched too many episodes of Selling Houses Australia, and thought ‘yeh, I’ve got this’. Oh how wrong I was… So naive, so foolish. So for any of you thinking to do the same and quickly change your door in an afternoon, see the process I used below. Forewarned is forearmed and all that!
1. Remove door from frame by scraping back 50-year old paint from rusted over screws. Discover that of all the ten screwdrivers you have around the house, none is that size, but luckily the bread knife is perfect! Realise how darn heavy timber doors are and enlist help to get the door from happily vertical to horizontal in another room. Realise door won’t fit through opening between said two rooms without intense yoga contortions. Swear quite a bit.
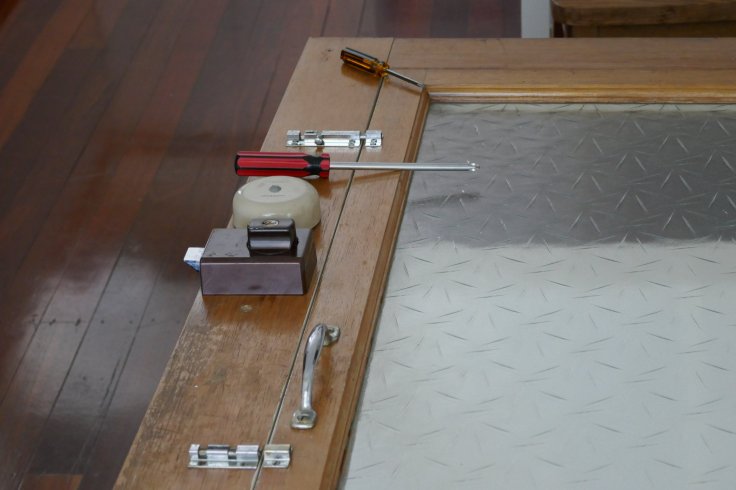
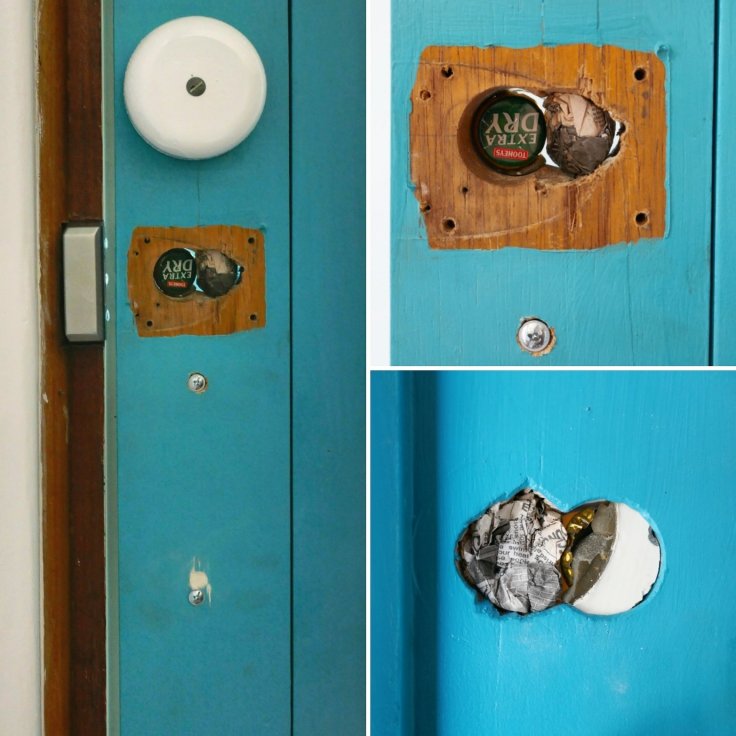
2. So now the door is lying down, remove the hardware. For me, this was four latch bolts, a dead bolt, two handles and a door bell. Realise why the door needed four latch bolts – because nothing is square or even and nothing stays closed without assistance. Also discover that the dead bolt was held in place by a plaster filled beer bottle top and some scrunched up newspaper, and now there is a large hole required sone form of rectification. Decide to worry about that later. Realise your terrible mistake trying to work with crooked, water damaged, dodgied timber, but also realise you’ve come too far to give up. You’re no quitter!
3. Ok. The door is ready for painting. Sand the surfaces to remove the shiny gloss. Sand some more. Use up all your sandpaper. Realise your door has a smaller hinged door inside it which is now loose because the door is horizontal and you’ve removed the four mysterious bolts. Try and get that open by jimmying the rusty hinges.
4. Go to Bunnings for more sandpaper and wd40. Clean back rusty hinges and then sand some more.
5. Paint the first coat. Realise that new bright coloured paint really doesn’t stick to old glossy white paint very well at all. Turn lights down and take glasses off so you can’t see the bad brush marks. Go and put your feet up for two hours while the paint dries.
6. Come back and realise how terrible the paint job is. Slap some more paint on there, it might make it better! Now it must be time for a beer.
7. Once the second coat is dry have another look. It’s not too bad after all, but not great. A light sand and another coat must surely fix it.. Go to bed and remember how your Saturday nights use to involve parties and socialising..
8. Wake up bright eyed and bushy tailed to get this DONE. You’re confident and can take on the world and can finish a single door for goodness sakes…
9. Look at less than perfect paint job but resign your door to its fate. Flip the door over and repeat all those steps on the other side… Another long day of literally watching paint dry. How do people do this for fun?
10. Ok, the door is kind of painted. Now to put all that hardware back on, and discover that of course, of course, new hardware has slightly different fixing locations. Meaning drill new holes. Which of course are a different drill bit size to every other fixing. So back to Bunnings for yet another drill bit…
11. Ok, two sausage sizzles and $300 of plants later, it’s time to get this door back on. Again enlist assistance to manoeuvre and lift into position and screw in all those rusty old screws.. Once it’s on, realise it no longer fits. Because it is now fixed less than a millimetre lower than it was before, so it closes but doesn’t open again without a good shove, except that the wind can grab it and slam it at random times when you’re not looking. Sigh and kick it a little. It might not help but makes you feel better. Realise it’s 10pm on Sunday night and you’ve basically spent the entire weekend transforming your badly painted white front door into a badly painted blue front door. That now doesn’t lock. Enlist three door stops to keep the door in place.

12. Ok, it’s a new weekend. We can do this! To give the door stops a break it’s time to sort out this deadbolt. Easy. Remove plaster filled beer bottle top and look for suitable replacement. An old broom handle seems just about right… Cut piece off broom handle and then sand/carve/wiggle and glue into place. Patch all around with lots of filler. Sand, paint, dry, repeat.. Nearly there!
13. Realise the deadbolt instructions have been thrown out in a ‘ I can’t live in this mess’ mid-renovation foolish clean-up, where only useful things are thrown out and the hundred miscellaneous-sized screws that came off things you can’t remember, remain.. Google deadbolt installation videos. Watch with confidence, it’s just screwing a few plates into the door, easy… Notice you are missing pieces.. Find said pieces and fashion together a deadbolt. Complete! Except… The key is in the deadbolt and won’t come out, or turn. Take it all off again. Watch Bunnings video again. Reinstall, this time confident you’ve figured it out. Die a little inside as now it won’t lock. Watch video again and notice his lock is slightly different to yours. Sigh. Remove all pieces and try again, and miracle of miracles you now have a functioning deadbolt.
14. Close and lock the door, and endeavour to never use the door again as it now sticks and the deadbolt is crooked and the paint is already chipping. Make friends and family come into your house through the side door and discourage door knockers with signage.
So there you have it, my easy 14-step process to making over your front door in a weekend…. Happy renovating!

Omg i am exhausted just reading your blog. You are amazing x
LikeLike
Ha ha, thanks Son! 🙂
LikeLike